SwiftUI on AppKit: Building a Dark Mode switcher
I spent a large part of last week learning and playing with SwiftUI. So far it’s been pretty frustrating at times since I kind of feel like I forgot everything I knew, but I’m also very excited about where this will lead us. I’ve summed up my first impressions in the “Thoughts on SwiftUI” post last week.
At the moment most of the available examples show how to use SwiftUI in iOS apps, but I wanted to see how it would work on the Mac (in AppKit), since it’s kind of closer to my heart (hint: look at the domain name :).
And I had an idea: last year, when I was playing with the new Dark Mode in macOS Mojave I had a plan to build a simple app that would let you override the appearance in specific apps using the NSRequiresAquaSystemAppearance setting. I started working on it, but I got stuck while figuring out the complex NSTableView API which I had no experience with, and I gave up.
So, how about I give it another try now, but with SwiftUI? I don’t really need such app myself (I only use light mode), and I’m pretty sure I’ve seen other similar apps last year, but this seems like a perfect way to try out SwiftUI on the Mac - and to see if it will be easier to get the table view to work…
Update 15.08.2020: I’ve updated all code to work with the latest (stable) version of SwiftUI, adapting it to all the changes that were made to the API in last year’s later betas.
∕ DarkModeSwitcher
Simple app for overriding light mode per app on macOS (demo for a blog post)

Building the app
In order to build a SwiftUI Mac app in Xcode, you need to have the beta version of macOS Catalina installed - SwiftUI will not work on Mojave. This is the first beta and some people have had serious issues with it, so be careful and don’t install it on your main computer. If you want to play with SwiftUI in UIKit, you can use this trick to make it run in a playground on Mojave, but it doesn’t work for AppKit.
And one more thing to note - Apple has unfortunately removed any remaining ways to force the dark mode per app in one of the later Mojave betas. The only thing we can still do (so far) is force the light mode if the rest of the system uses dark mode.
So, let’s begin. First, we’re going to need a list of all installed apps. Let’s define an app model:
class AppModel {
    let name: String
    let bundleURL: URL
    var icon: NSImage?
    var bundleIdentifier: String?
    var requiresLightMode: Bool = false

    init(bundleURL: URL) {
        self.name = bundleURL.deletingPathExtension().lastPathComponent
        self.bundleURL = bundleURL
    }
}
We’ll store the list of apps in a list manager called AppList. We’ll make it an ObservableObject so that the UI can subscribe to updates in apps, and we’ll use @Published to send updates whenever the app list changes:
class AppList: ObservableObject {
    @Published var apps: [AppModel] = []
}
The AppScanner class will take care of finding and returning the installed apps:
class AppScanner {
    var applicationFolders: [URL] {
        return FileManager.default.urls(for: .applicationDirectory, in: .allDomainsMask)
    }

    func findApps() -> [AppModel] {
        var foundApps: [AppModel] = []
        let manager = FileManager.default

        for folder in applicationFolders {
            do {
                var isDirectory: ObjCBool = false
                let exists = manager.fileExists(atPath: folder.path, isDirectory: &isDirectory)

                guard exists && isDirectory.boolValue else { continue }

                let urls = try manager.contentsOfDirectory(
                    at: folder,
                    includingPropertiesForKeys: [],
                    options: [.skipsHiddenFiles]
                )

                for url in urls {
                    guard url.pathExtension == "app" else { continue }

                    let app = AppModel(bundleURL: url)
                    foundApps.append(app)
                }
            } catch {
                NSLog("Error: couldn't scan applications in %@", "\(folder)")
            }
        }

        return foundApps
    }
}
Notice that we manually add the /System/Applications path to the list - in macOS Catalina, built-in apps are now located on the read-only volume (!) and they’re put inside /System. Finder however does some magic tricks and displays them as if they were all in /Applications, so you don’t see the difference there, only in the terminal. FileManager.urls(for:in:) should of course find them too, but right now it doesn’t.
The findApps() method will be run asynchronously from AppList.loadApps:
func loadApps() {
    DispatchQueue.global(qos: .userInitiated).async {
        let foundApps = AppScanner().findApps()
        let sortedApps = foundApps.sorted(by: { (app1, app2) -> Bool in
            return app1.name.localizedCaseInsensitiveCompare(app2.name) == .orderedAscending
        })

        DispatchQueue.main.async {
            self.apps = sortedApps
        }
    }
}
We can now build a very simple SwiftUI list view that displays found apps:
struct ContentView: View {
    @ObservedObject var appList: AppList

    var body: some View {
        List(appList.apps, id: \.bundleURL) { app in
            Text(app.name)
        }
        .frame(minWidth: 450, minHeight: 300)
    }
}
Since our ContentView requires an AppList, we need to pass it one in the preview too - we’ll just prepare a hardcoded list of a few apps:
struct ContentView_Previews: PreviewProvider {
    static var previews: some View {
        let names = ["Firefox", "Pages", "Slack", "Twitter"]
        let appList = AppList()
        appList.apps = names.map {
            AppModel(
                bundleURL: URL(string: "/Applications/\($0).app")!
            )
        }

        return ContentView(appList: appList)
    }
}
(Pro tip: unless you’re working on a 20+ inch screen, you might struggle to fit both code and preview on the screen at the same time without longer code lines breaking - in that case, you may find the Cmd+Enter and Cmd+Alt+Enter shortcuts useful for switching the preview pane on and off.)
Finally, we also need to update the AppDelegate to create the ContentView with an AppList (and tell it to load the apps). While we’re there, let’s also set the window’s title:
// ... other window properties ...

window.title = "Dark Mode Switcher"

let appList = AppList()
appList.loadApps()

window.contentView = NSHostingView(rootView: ContentView(appList: appList))
We should now get something like this:
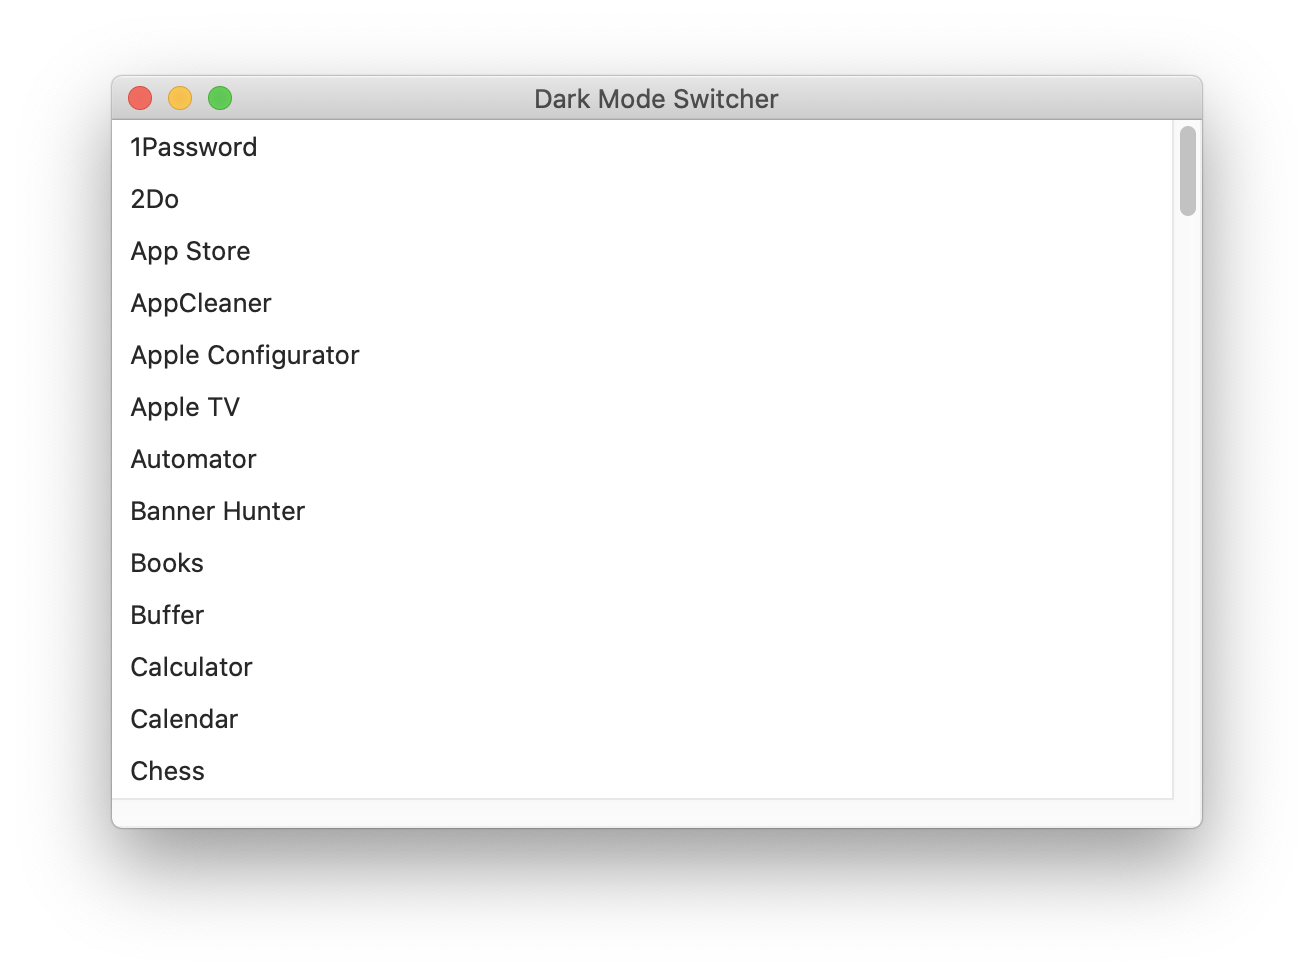
Great 👍 It would be nice though to show app icons on the list, wouldn’t it? To do that, we’ll need to find and parse each app’s Info.plist.
Displaying icons
To decode the plist files, we’ll use PropertyListDecoder and a simple Codable struct:
struct AppInfo: Codable {
    let iconFileName: String?
    let bundleIdentifier: String

    enum CodingKeys: String, CodingKey {
        case iconFileName = "CFBundleIconFile"
        case bundleIdentifier = "CFBundleIdentifier"
    }
}
We’ll also read the bundle identifiers, which we’ll later need to pass to defaults to read & write the NSRequiresAquaSystemAppearance setting.
Reading the Info.plists will be done in AppScanner’s processApp method:
func processApp(app: AppModel) {
    let plist = app.bundleURL
        .appendingPathComponent("Contents")
        .appendingPathComponent("Info.plist")

    do {
        let contents = try Data(contentsOf: plist)
        let info = try PropertyListDecoder().decode(AppInfo.self, from: contents)

        DispatchQueue.main.async {
            app.objectWillChange.send()
            app.bundleIdentifier = info.bundleIdentifier

            if let iconFileName = info.iconFileName {
                let iconFile = app.bundleURL
                    .appendingPathComponent("Contents")
                    .appendingPathComponent("Resources")
                    .appendingPathComponent(iconFileName)

                app.icon = iconFile.pathExtension.isEmpty ?
                    NSImage(contentsOf: iconFile.appendingPathExtension("icns")) :
                    NSImage(contentsOf: iconFile)
            }
        }
    } catch let error {
        print("Could not load app info for \(app.name): \(error)")
    }
}
We’ll call this method asynchronously from findApps, so that we can quickly return the list of app names and then load the icons in the background:
for url in urls {
    // ...
    DispatchQueue.global(qos: .userInitiated).async {
        self.processApp(app: app)
    }
}
Notice the app.objectWillChange.send() at the beginning of processApp() - we need to somehow notify the UI that an app was updated. To do that, we’ll mark the AppModel as an ObservableObject just like the list and we’ll manually send notifications through the objectWillChange property (included automatically in ObservableObject) when the app is updated - then we’ll bind each app’s row view (which we’ll extract as a separate view) to that model.
class AppModel: ObservableObject {
    ...
Let’s now update the UI to display the icons:
private let iconSize: CGFloat = 32

struct ContentView: View {
    @ObservedObject var appList: AppList

    var body: some View {
        List(appList.apps, id: \.bundleURL) { app in
            AppRowView(app: app)
        }
        .frame(minWidth: 450, minHeight: 300)
    }
}

struct MissingAppIcon: View {
    var body: some View {
        Circle()
            .fill(Color.gray)
            .padding(.all, 2)
            .frame(width: iconSize, height: iconSize)
            .opacity(0.5)
            .overlay(Text("?").foregroundColor(.white).opacity(0.8))
    }
}

struct AppRowView: View {
    @ObservedObject var app: AppModel

    var body: some View {
        HStack {
            if app.icon != nil {
                Image(nsImage: app.icon!)
                    .resizable()
                    .frame(width: iconSize, height: iconSize)
            } else {
                MissingAppIcon()
            }

            Text(app.name)
        }
    }
}
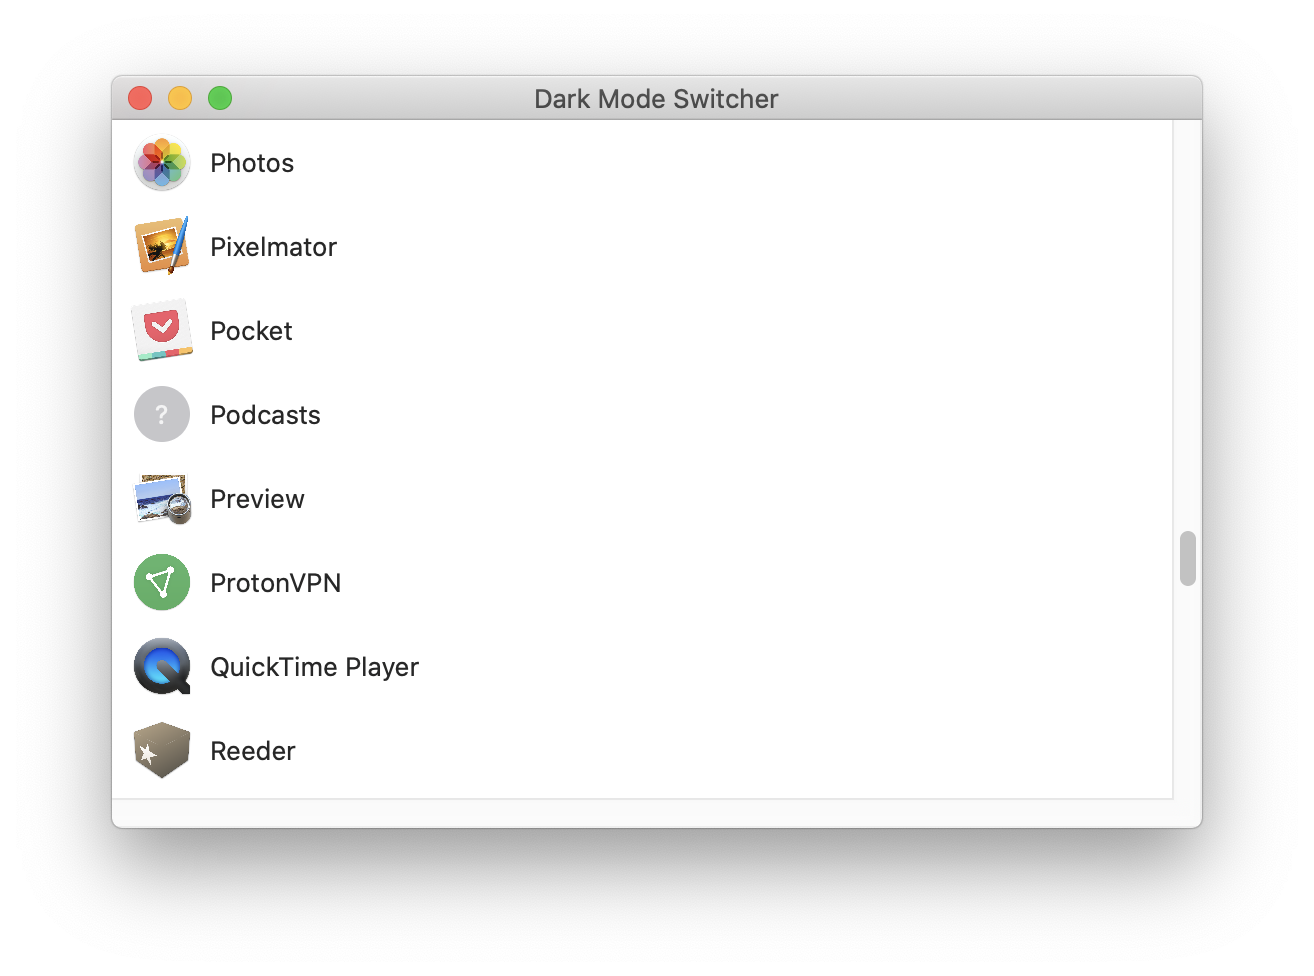
For the previews, we’ll add a couple of icons to the “Preview Assets” asset catalog and make the sample apps load them:
static var previews: some View {
    let names = ["Firefox", "Pages", "Slack", "Twitter"]
    let appList = AppList()
    appList.apps = names.map {
        let app = AppModel(
            bundleURL: URL(string: "/Applications/\($0).app")!
        )
        app.bundleIdentifier = "app.\($0)"
        app.icon = NSImage(named: app.name.lowercased())
        return app
    }

    return ContentView(appList: appList)
}
Now it looks much better:
Light mode switches
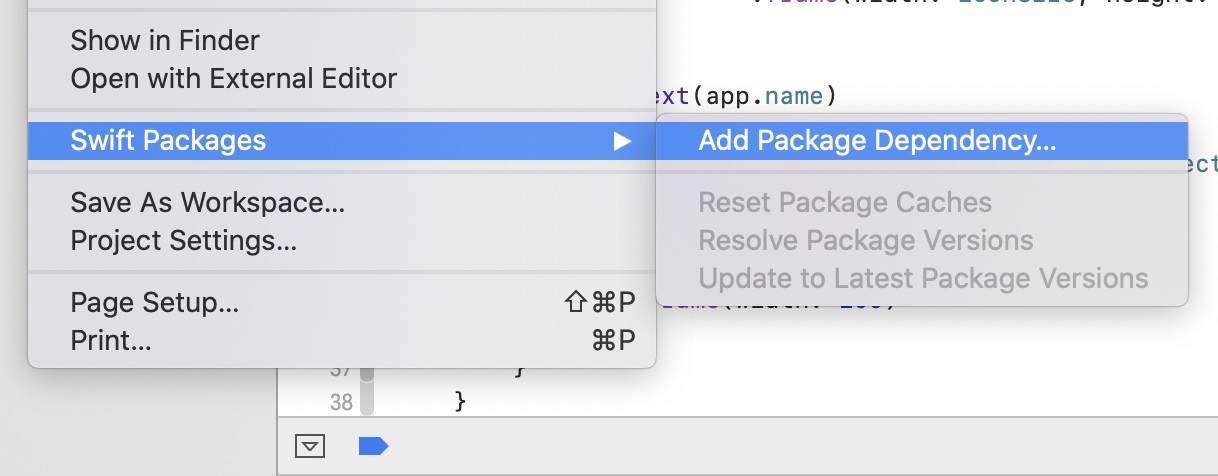
The last missing piece in the app rows are the switches that will show us the current light mode setting and let us change it. For that, we’ll need to make calls to the defaults command, passing it the app’s bundle identifier. We’re going to use John Sundell’s ShellOut micro-library to save us some work - luckily, adding Swift packages to Xcode projects is now super easy (from the File menu):
We’ll wrap the calls to the shell in a new Defaults class:
private let RequiresAquaSetting = "NSRequiresAquaSystemAppearance"

class Defaults {
    func checkRequiresLightMode(for bundleIdentifier: String) -> Bool? {
        do {
            let arguments = ["read", bundleIdentifier, RequiresAquaSetting]
            let value = try shellOut(to: "defaults", arguments: arguments)

            return (value == "1")
        } catch {
            // ...
        }

        return nil
    }

    func setRequiresLightMode(_ lightMode: Bool, for bundleIdentifier: String) {
        do {
            let arguments = lightMode ?
                ["write", bundleIdentifier, RequiresAquaSetting, "-bool", "true"] :
                ["delete", bundleIdentifier, RequiresAquaSetting]

            try shellOut(to: "defaults", arguments: arguments)
        } catch let error {
            print("Error setting default for \(bundleIdentifier): \(error)")
        }
    }
}
We’ll check each app’s current setting in AppScanner.processApp:
let contents = try Data(contentsOf: plist)
let info = try PropertyListDecoder().decode(AppInfo.self, from: contents)
let defaultsSetting = Defaults().checkRequiresLightMode(for: info.bundleIdentifier)

DispatchQueue.main.async {
    app.objectWillChange.send()

    // setting app.bundleIdentifier and app.icon ...

    if let defaultsSetting = defaultsSetting {
        app.requiresLightMode = defaultsSetting
    }
}
We’re also going to need some kind of property in the AppModel to which we can bind the toggle’s selection, so that the setting is automatically saved with defaults write when the toggle is switched. We could probably bind it to requiresLightMode, but then its didSet would also be called during the initialization above, so let’s separate it into a second derived property:
enum ModeSwitchSetting {
    case auto
    case light
}

var modeSwitchSetting: ModeSwitchSetting {
    get {
        requiresLightMode ? .light : .auto
    }

    set {
        guard let bundleIdentifier = bundleIdentifier else {
            fatalError("No bundleIdentifier set")
        }

        if newValue != modeSwitchSetting {
            requiresLightMode = (newValue == .light)

            DispatchQueue.global(qos: .userInitiated).async {
                Defaults().setRequiresLightMode(newValue == .light, for: bundleIdentifier)
            }
        }
    }
}
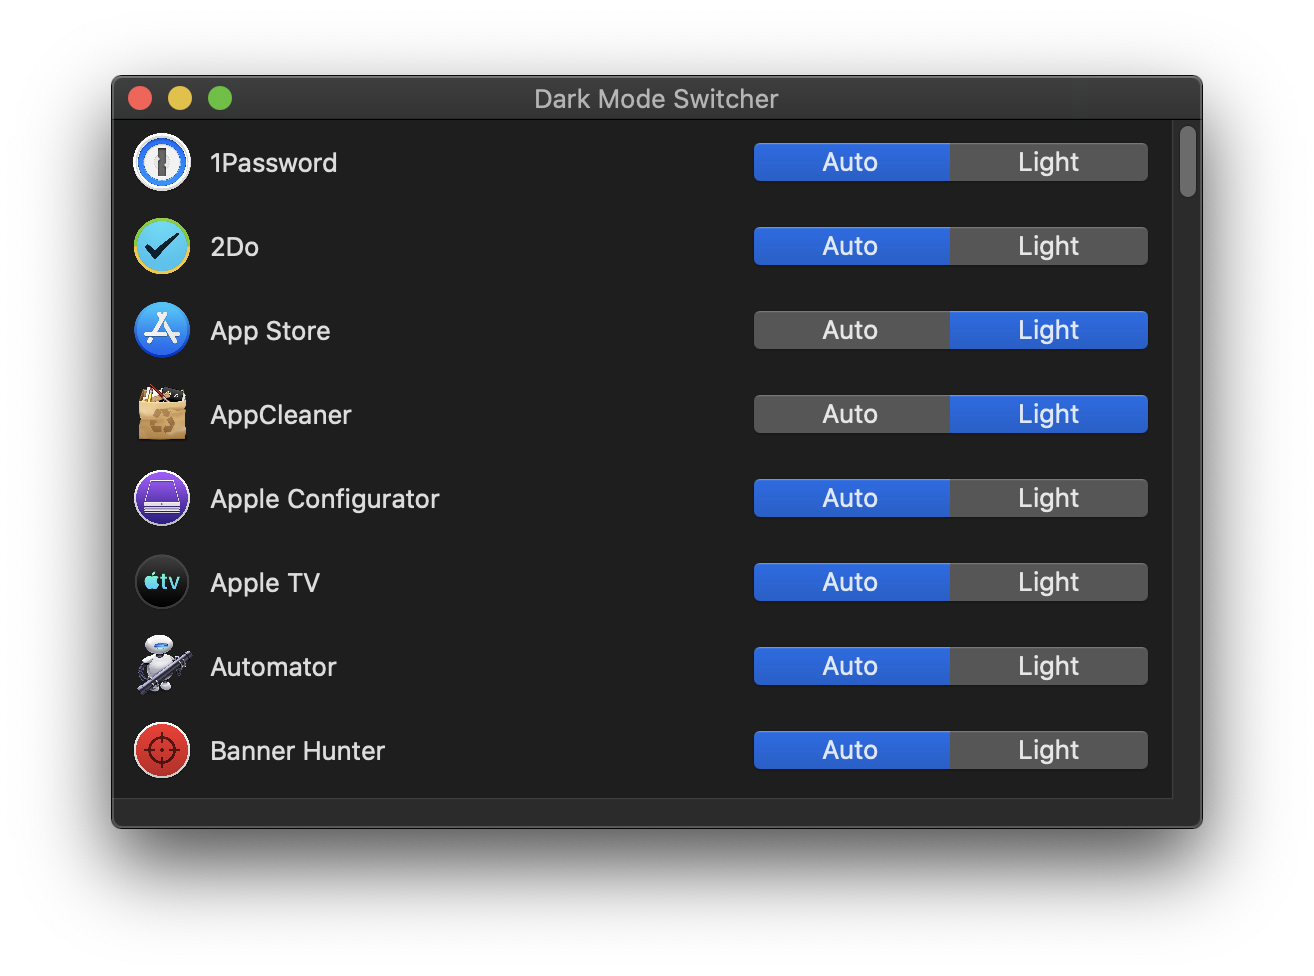
Now we can add the switches to the table view - we’ll use a segmented picker for that:
var body: some View {
    HStack {
        // ...

        Spacer()

        Picker("", selection: $app.modeSwitchSetting) {
            Text("Auto").tag(AppModel.ModeSwitchSetting.auto)
            Text("Light").tag(AppModel.ModeSwitchSetting.light)
        }
        .pickerStyle(SegmentedPickerStyle())
        .disabled(app.bundleIdentifier == nil)
        .frame(width: 200)
    }
}
And voila! You should now be able to see which app has the light mode override enabled, toggle the setting for some apps and see it applied when the app is relaunched (at least for some apps, e.g. Calendar - probably not all apps will be willing to cooperate):
Monitoring running apps
There’s one more thing we could add to improve the user experience - since it’s not obvious that you need to restart an app to notice any change, we could show a warning icon when you change the setting for an active app.
Luckily, getting a list of active apps on macOS is very easy - we just need to call NSWorkspace.shared.runningApplications. The property can also be observed with KVO, and we’ll be immediately notified of changes when any app is launched or terminated (note: this only includes apps that appear in the dock).
First, we need to add a couple of properties to AppModel. isRunning will store the running status, and needsRestart will be set whenever modeSwitchSetting is changed when the app is running, and cleared when it stops running.
@Published var needsRestart: Bool = false

@Published var isRunning: Bool = false {
    didSet {
        if !isRunning {
            needsRestart = false
        }
    }
}

var requiresLightMode: Bool = false {
    didSet {
        if requiresLightMode != oldValue {
            needsRestart = isRunning
        }
    }
}
The AppList will take care of observing the list of running apps and updating the status of each app:
var runningAppsObservation: NSKeyValueObservation?

func startObservingRunningApps() {
    runningAppsObservation = NSWorkspace.shared.observe(\.runningApplications) { _, _ in
        self.updateRunningApps()
    }

    updateRunningApps()
}

func updateRunningApps() {
    let runningApps = NSWorkspace.shared.runningApplications
    let runningIds = Set(runningApps.compactMap({ $0.bundleIdentifier }))

    for app in self.apps {
        if let bundleId = app.bundleIdentifier {
            app.isRunning = runningIds.contains(bundleId)
        }
    }
}
The method startObservingRunningApps() should be called from loadApps(), right after we assign the apps property.
We can now show a warning icon in those rows where an app’s setting was changed, but the app was not relaunched after the change was made. The new SFSymbols icon set unfortunately isn’t available to AppKit apps yet; however, AppKit does have its own small set of system icons that were available basically since the beginning of time and haven’t been updated much since then. You can see them in the media library when you open it on a storyboard (but not in the code editor):
![]()
Let’s use the “caution” icon - the icons are used by passing the name you can see in the list as the identifier to NSImage:
// ...
Spacer()

if app.needsRestart {
    Image(nsImage: NSImage(named: "NSCaution")!)
        .resizable()
        .frame(width: 28, height: 28)
        .padding(.trailing, 5)
        .accessibility(
            label: Text("App requires restart")
        )
}

// ...
Now you should see the warning appear when you switch the toggle for a running app, and disappear when you quit the app:

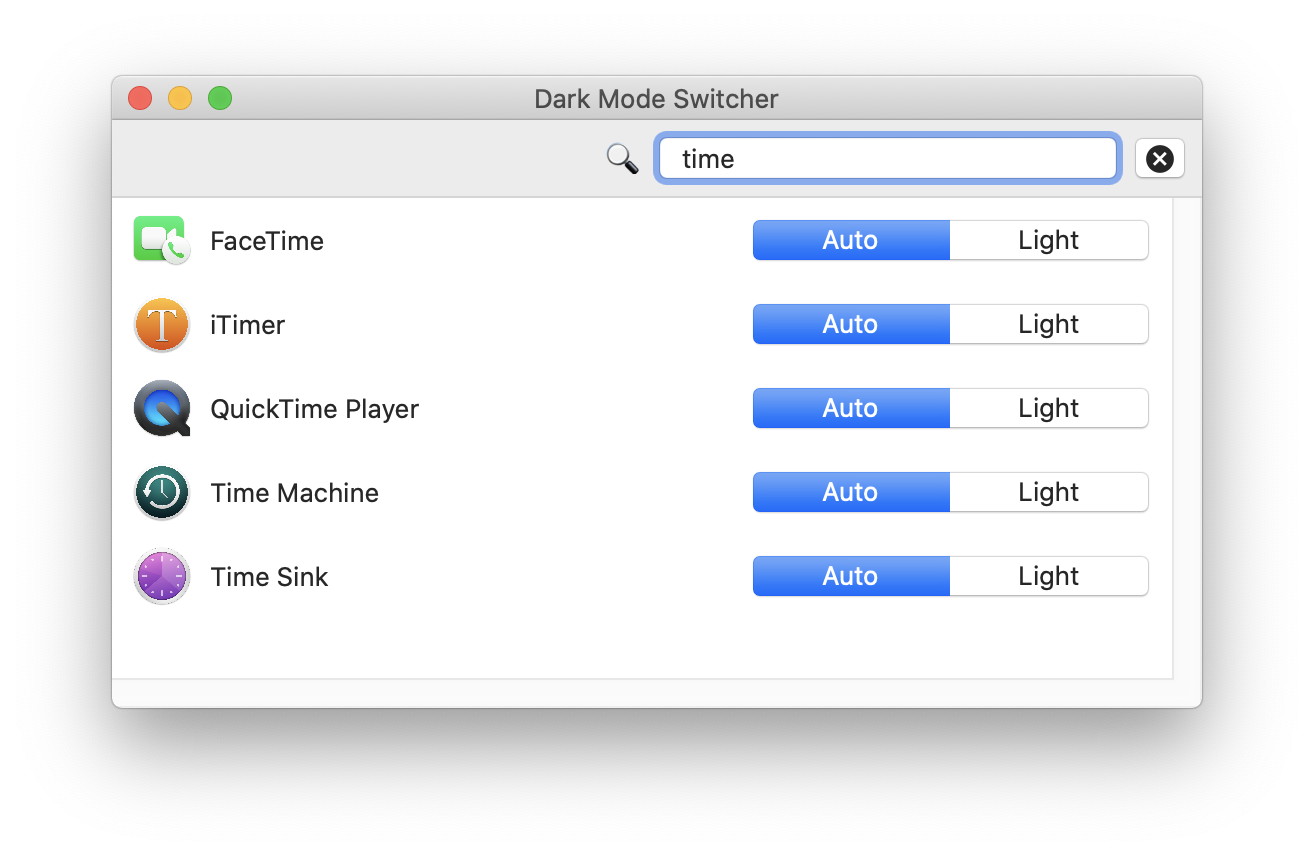
Search bar
Ok, one last thing - how about a search bar for filtering apps at the top of the window? This one will be really simple, we can implement it completely in the SwiftUI view.
First, we’ll add another component named SearchBar. Ideally we’d use some kind of search-styled text field, but there doesn’t seem to be one yet, so we’ll kind of fake it using an emoji and a custom clear button next to the field (we’ll use another built-in AppKit icon):
struct SearchBar: View {
    @Binding var query: String

    var clearIcon: NSImage {
        NSImage(named: "NSStopProgressFreestandingTemplate")!
    }

    var body: some View {
        HStack(spacing: 0) {
            Spacer()

            Text("🔍")

            TextField("Search", text: $query)
                .textFieldStyle(RoundedBorderTextFieldStyle())
                .padding(8)

            Button(action: clearQuery) {
                Image(nsImage: clearIcon)
                    .opacity(query.count == 0 ? 0.5 : 1.0)
            }
            .disabled(query.count == 0)
            .padding(.trailing, 8)
        }
        .onExitCommand(
            // called when you press ESC
            perform: clearQuery
        )
    }

    func clearQuery() {
        self.query = ""
    }
}
The query will be defined in the main view, because we’ll need it for filtering, and we’ll pass it to the search bar as a binding. The button on the right clears the entered query text, and is disabled (with a grayed out icon) if the field is empty.
Now in the main view we define the query, wrap the list view in a VStack, add the search bar and a thin divider line below it, and instead of all apps, we’ll only return those that match the query:
struct ContentView: View {
    @ObservedObject var appList: AppList
    @State var query: String = ""

    var matchingApps: [AppModel] {
        if query.isEmpty {
            return appList.apps
        } else {
            return appList.apps.filter({
                $0.name.lowercased().contains(query.lowercased())
            })
        }
    }

    var body: some View {
        VStack(spacing: 0) {
            SearchBar(query: $query)

            Divider()

            List(matchingApps, id: \.bundleURL) { app in
                AppRowView(app: app)
            }
        }
        .frame(minWidth: 450, minHeight: 300)
    }
}
Ok, I lied - we need to change one small thing in AppDelegate too. When the NSWindow is created there, it’s passed a flag fullSizeContentView - which is basically the equivalent of that iOS 7 thing with content hiding below the navigation bar. If that flag is used, then unless the content at the top is scrollable, it will hide below the title bar and won’t be visible (that also includes the Text("Hello world") from the template). It took me a while to figure out why the top of the view isn’t laid out correctly… I’ve filed a radar about this and I hope they’ll update this template in later betas, but for now you need to remove this flag from there.
Now we can use the search bar to quickly find the app we’re interested in:
And that’s it, our app is complete - it wasn’t that hard, was it? 😄 You can find the full code here (WTFPL): https://github.com/mackuba/DarkModeSwitcher.
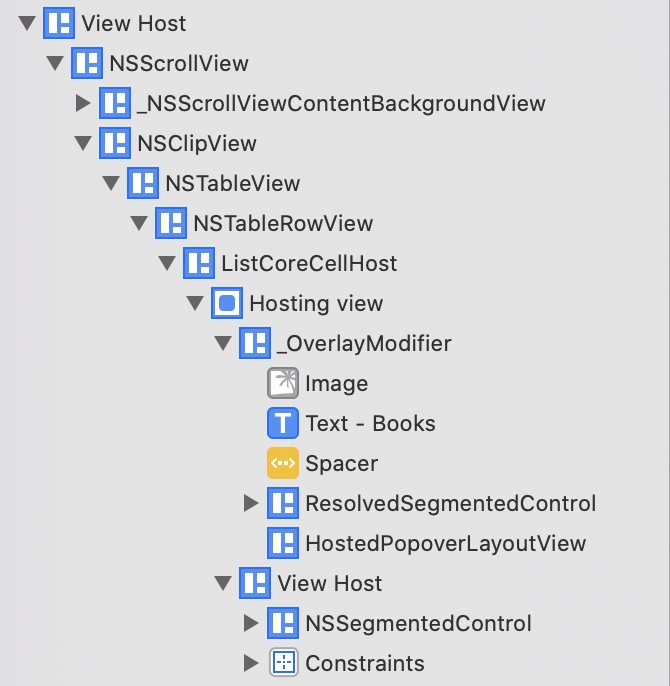
I suppose this might not be the best possible demonstration of using SwiftUI with AppKit, since the result doesn’t really look very… appkity, you could probably build a similarly looking list with Catalyst. Hopefully at least the segmented controls give it away. I was actually assuming the whole time that this wasn’t a proper NSTableView but rather some platform-independent SwiftUI list implementation, but it turns out it really is an NSTableView:
TODO
There are definitely a few things that I’d like to do better, if I knew how:
- I had to hardcode a constant width for the segmented controls, ideally this should be dynamic depending on the locale - but without this, the controls actually had different widths depending on the app name, I wanted them to all have the same width (it’s possible that
.alignmentGuidewould help?) - I’d like to show a tooltip when the mouse cursor hovers over the warning icon, to explain what this means
- I’d like to use some more Mac-specific
NSTableViewfunctionality like the alternating background colors for even & odd rows you can see e.g. in Finder - the search bar could look more like
NSSearchFieldorUISearchBar - the check for
if app.icon != nilis obviously ugly, butif letdoesn’t work - the bindings code was generally all done in an “I have no idea what I’m doing” style, so that can probably be improved
I’d like to disable the slide-in animation when the list rows are added and just make them all appear immediatelyI don’t know if there’s any way to add an “empty” image with no content that still takes the assigned space, like(useNSImageView(image: nil)(although the question mark icon looks better I think)Image("")if you want that)I tried the.previewLayoutmodifier used in one of the tutorials to show a preview of a singleAppRowViewat a fixed full size, but it was always showing it very small with no spacer between the title and the switchesfor some reason I’m getting a ton of AutoLayout constraint errors (yes, AutoLayout!) in the console about the vertical arrangement of the segmented controls, I have no idea what this is aboutdidChange.send()should not require this weird(())thing (thanks @_Jordan for the tip) because they’ve used it assend()on the slides, but somehow it does
And so on. Feel free to send me PRs, tweets and comments if you have any suggestions for improvements :)
2 comments:
Ostap
Hi Cuba,
Did you figure out how to apply vibrance, visual effect to SwiftUI UIHostingController window? Looks like apple forgot about this possibility.
Kuba • mackuba.eu
Hi Ostap,
I haven't been playing much with SwiftUI at all after finishing this article, because I decided to focus on releasing my iOS app Banner Hunter (which I finished last week). I'm planning to get back to it somewhere in the autumn, catch up on all the changes and then maybe collect some kind of cheat sheet / reference for AppKit SwiftUI API, but I haven't even started working on that yet.