Making iOS apps compatible with iPhone 6/6+
This is the first part of a new (hopefully) longer series of tutorial-like posts. I’m planning to write shorter posts now but more often, based on specific things that I learn while working on my current projects. Let’s see how long I manage to keep this going… :)
Let’s say you have an iOS app that was build for iPhone 5S and earlier. Now that the new iPhones are out, you want to make it work on them too.
If you don’t change anything and just build your app with the latest Xcode and iOS SDK, you’ll see that the app runs on the new iPhones scaled up: the views are rendered on a standard iPhone 5S sized screen and then resized to a bigger resolution like you would resize a static image, together with the top/bottom bars and everything (which obviously doesn’t look good).
To make the app render on the new iPhones natively, you need to let iOS know that it supports them. There are two ways to do that:
Adding additional launch screens
You have one or more launch screen images in your app - you know, the ones that are theoretically supposed to show some UI elements with empty lists, but everyone uses them to show nice looking splash screens with their logo… You probably have a 640 × 1136 version for 4" iPhones and a 640 × 960 version for 3.5" iPhones (and possibly a smaller one for the really old ones).
Now, you’ll need to add two more:
- 750 × 1334 version for iPhone 6
- 1242 × 2208 version for iPhone 6 Plus (hello @3x…)
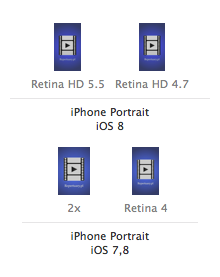
If you’re still managing those images manually, it’s a much better idea to switch to asset catalogs. Xcode then shows you something like you can see below and shows you exactly which images you’re missing and what dimensions they should have:
Adding a launch screen XIB
A new (and probably recommended) approach is to have a single XIB that acts as a launch screen instead of separate images. You can then use AutoLayout to make it scale to any resolution.
To do that, add a new XIB using the “Launch Screen” template. Lay out some elements in the view and configure the layout using AutoLayout constraints. Notice though that the launch screen will run only as a view, without a view controller - so there are limits to what you can make it do.
Then go to your target’s settings. In the “General” tab, there’s a “Launch Images” field and a “Launch Screen File” field. Choose your new XIB from the list in the latter, and set “Launch Images” to “Don’t use asset catalogs”. You can delete the old images, you won’t need them (unless you also need to support iOS 7 and earlier - in that case keep the images and leave both fields set).
The advantage of this method is that you only need one XIB and you don’t need to export a few separate images from your graphics application, carefully checking the pixel dimensions. The downside is that you might not be able to design more complex splash screens this way…
Note: iOS caches rendered launch screen views as images. So if you’re wondering why your launch screen doesn’t work or doesn’t update, it’s probably because of that cache. Delete the app from the home screen in the simulator and start it again, and it should work.
Fixing the layout
That’s just the beginning. Once you run the app in the correct resolution, you’ll probably notice that a lot of things look wrong. Look through all screens in the app and the matching code and find all the places where you’ve put a magic constant, thinking that no one would notice. All your coding sins will suddenly be brought to light… :)
Look for suspicious-looking things like:
- constants storing element sizes like LabelWidth
- calls to e.g.
CGRectMakewith some very specific numbers passed as the width or position - controls missing AutoLayout constraints or autoresizing masks
- calculating the number of lines by hardcoding the number of elements that fit on one line
- the number 320
(Yes, I’ve done most of these in one project…)
The sad truth is that we should have written our apps from the beginning not assuming the screen dimensions (or at least the width) will always be constant. But of course we were lazy, and now we’ll need to fix what’s broken and start doing things right. Who can guess right now what resolution will iPhone 7 have? Let’s try to make sure we don’t have to fix the same things again in two years.
Landscape mode
If you’ve seen an actual iPhone 6 Plus device, you know that it’s not just slightly bigger, it’s way bigger than most normal smartphones. It’s actually big enough that it can handle apps running in landscape mode with two vertical panes side by side like on the iPad. Because of that, some of the built-in apps got a new special landscape mode made specially for iPhone 6 Plus, and some third party apps have followed Apple’s lead. This isn’t of course required in any way, but it’s just something you might want to consider for a next version, after you’ve done all the essential updates, to further improve the experience of your users who use iPhone 6 Plus.
Preparing the @3x assets
For every image you use in the app, you’ll also need to provide a @3x version. Again, if you’re just manually adding @2x and @3x files to the Xcode project tree, I recommend that you look into asset catalogs since they make managing this much easier. Adding new images is very easy then: just select the 2-3 versions of the same image in Finder and drag them into the list of images in the asset bundle in Xcode - it will automatically create a new image with those versions and assign them into the right places.
Screenshots
And last but not least, when submitting a new version to the App Store, you should also have iPhone 6 and iPhone 6 Plus screenshots prepared (they don’t seem to be required at the moment, but probably will be soon). Just a small tip in case you haven’t thought of that: the easiest way to make those is to just press Cmd+S in the simulator (the screenshots are saved to your desktop). (I think there are also tools that automate this process completely, but I haven’t tried any of them.)
1 comment:
Steinar Knutsen • www.mobilepodcaster.com
Thank you. This was very helpful!