Interface Builder tips and tricks
I read Apple’s tutorial about Interface Builder this week. Most parts of it told about rather basic things and were quite boring, but I’ve learned several useful tricks from it. IB, like most of Apple’s applications, has lots of hidden features which aren’t obvious at first, and can only be found by experimenting, by accident or by reading about them somewhere. Here’s a few things that I’ve learned from the tutorial – some of them are such hidden features, some are just things that weren’t mentioned in any source I’d read before.
- It pissed me off a few times when I carefully laid out controls in a window, set their autoresizing properties, and then when I resized the window, the controls didn’t resize together with it, and I had to do that myself. Well, guess what? Hold Cmd while resizing the window, and the controls start resizing as expected…
- Or you can check “live autoresizing” option in “layout” menu, then the resizing will be on by default, and holding Cmd will turn it off.
- When you press Shift instead of Cmd while resizing, IB will help you change only one dimension, e.g. resize the window only vertically or only horizontally.
- Shift can also be combined with Cmd :)
- Press Alt and drag a control, and you’ll create a duplicate of it.
- After selecting a control, press arrows to move it by 1 pixel in that direction. Add Shift to that, and they’ll move by 5 pixels.
- If you sometimes have trouble selecting the right object when several of them are stacked in the same location (e.g. table / table column / column cell), you can:
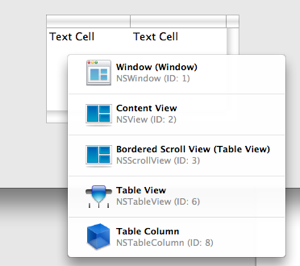
- Ctrl+Shift+click in that location – you’ll get a popup with a nice list of all controls located in that place:

- right click on a control to show a list of its connections – then, in the top right corner of the HUD panel 1) there is a combo box, which lets you select the right object (this is useful if you just want to access its connections)
- Ctrl+Shift+click in that location – you’ll get a popup with a nice list of all controls located in that place:
- If you need to make a lot of connections to one control, right click (or Ctrl+click) on it to open the connections panel, and move it a bit. Once you move it, it stays open even if you start clicking on other controls, until you manually close it. (If you don’t move it, it hides when you click anywhere outside it.)
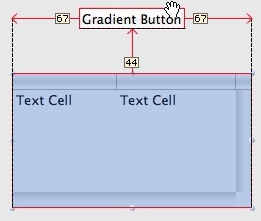
- Press Alt while the cursor is hovering over a control – IB will display four arrows showing distances in pixels from the sides of the control to the borders of the container.
- Do this while another control is selected, and it will show you the horizontal/vertical distance between the two controls.

- Do this while another control is selected, and it will show you the horizontal/vertical distance between the two controls.
- You can add “layout guides” to the window by choosing an option from the “layout” menu. These are red vertical or horizontal lines, which aren’t visible outside of IB, but are there to help you align a group of controls to the same, invisible line.
- When you create a new window by dragging it from the Library and dropping it somewhere on the screen, its initial position (i.e. the position at which it will be initially put when it’s displayed by an application) is set to the location where it was dropped. If you move it later around the screen, the initial position doesn’t change anymore – it can only be changed in the Inspector, in the “size” tab.
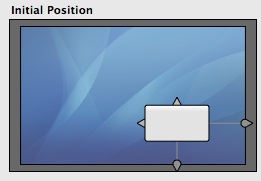
- While setting the initial position in the Inspector, you can click on any of the four arrows on the edges – they will extend and attach themselves to the screen border; this will mean that the distance between the border and the window will be fixed. Use this to tell that, for example, the window should always appear 20px from the right border of the screen, regardless of the screen size.

- While setting the initial position in the Inspector, you can click on any of the four arrows on the edges – they will extend and attach themselves to the screen border; this will mean that the distance between the border and the window will be fixed. Use this to tell that, for example, the window should always appear 20px from the right border of the screen, regardless of the screen size.
- If you have some specific kinds of customized controls that you use often (e.g. a button with a specific color, size, or font), you can drag such control from a window back into the Library (to the “custom objects” group or to another group created by you (right click in the Library, then “New group”)). It stays there until you remove it, and is visible globally, regardless of which NIB file is currently open.
- You can do the same with whole groups of controls.
- If you need more space in the Library, you can drag the splitter between the list of categories and the list of items to the top – it then changes to a combo box, so you can have more space for the items and still be able to switch between categories.
That’s all – I hope this will be useful for somebody…
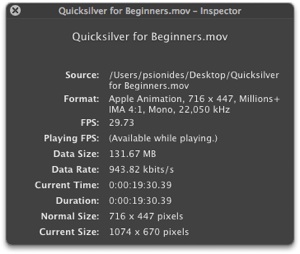
1) In case you wonder what does “HUD panel” mean – it’s a name used for all those small grey translucent panels, used in IB, iPhoto and other iApps; it’s an acronym for Heads-up display. This is a HUD panel from Quicktime:

1 comment:
hardwarrior
Sweet! Very useful tips indeed!